Content Tab
The Content tab is where content can be added to the Structures that make up your website. On the Content tab, you can add edit, delete, reorder, and search Entries, which are the sets of data in Collections and Sections.
The Content tab is designed to be incredibly easy to use, so that anyone, including your clients, can manage data easily.
The Content tab only becomes useful once some structures have been created in the Site > Content Management tab. Before that, it just contains welcome information and a link to the Site > Content Management tab.
Root-level (Website subtab)
When you first navigate to the Content tab, you will see the Website subtab. On this tab is a list of the root-level superstructures on your website. Click on one of them to manage the content in that structure.
If you click on a Collection, you will be taken to the List View. If you click on a Section, you will be taken directly to the Edit View. If you click on an External structure, the external page will be loaded (either in an IFRAME or new window, depending on how the structure is configured.)
List View
The list view displays all entries in a collection in a tabular list:
All structures that have the Show in List View? attribute set will be displayed in the table. Additionally, any Child Collections or Reverse Associations on the Collection will have a link displayed in the table that allows you to navigate to that child collection or reverse association.
At the right of the table are links to Publish/Unpublish, Edit, and Delete each entry:
Navigating to Child Collections
In the following picture, Mammals and Reptiles are both Child Collections of Animals. Clicking on either will open the List View for the Child Collection.
The tab navigation bar at the top will expand to show the current child collection as the selected tab, and the selected entry from the parent collection as its own tab. Clicking the selected entry from the parent Collection will take you directly to its Edit View.
If there is no link for a Child Collection, this is because the collection has the Hidden? attribute set.
Publishing and Unpublishing Entries
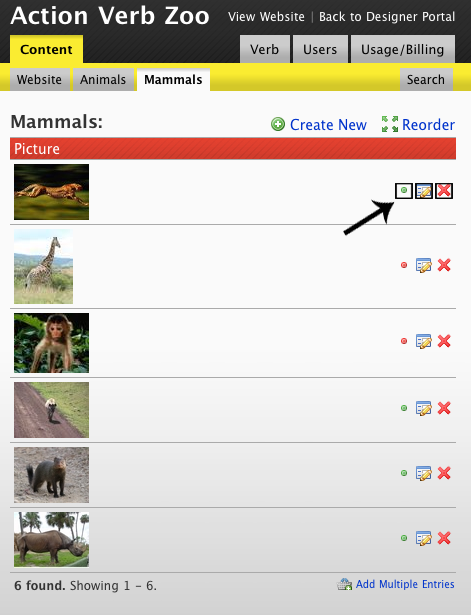
At the right of every entry in the list, there is a green or red dot. This represents the publishing status of that entry. If the dot is green, it means that the entry is published and live on the website. If the dot is red, it means that the entry is not published and will not be seen on the website:
You may toggle an entry between published and unpublished by clicking the dot. New entries are always published by default. Note that unpublishing an entry completely removes it from the website and unavailable to VaeML. This also means that you will no longer be able to access it through the the PHP API.
Unpublishing an entry is useful if you want to temporarily remove a section from your website or get new pages ready for a launch. Unfortunately, pages that are not published cannot be previewed in any way. We are experimenting with different ways to address this situation for future versions of Vae.
Reordering Entries
If automatic sorting is not enabled for this collection, you can rearrange the entries into whatever order you’d like. Click the Reorder link at the top right corner of the list view. This will bring up the Drag to reorder page, which lists all entries in the collection:
On the reorder screen, you crag and drop the entries into the order that you would like and click the Done button to save your chosen order. Click the Cancel link to go back to the List View. If you do not click Done, the order will not be saved:

Only the title field for each entry is shown on the Drag to reorder page. This was done to avoid clutter on the reordering page. If you are not able to disambiguate your entries based on what is displayed, you should set a more specific title field for this collection. If there is no title field defined, and the collection includes an Image structure, the uploaded image from the first image structure will be displayed for each entry.
If the collection is a Nested Collection, the reorder page will render all entries in a tree view. Within the tree view, you may not only reorder within each level of the hierarchy, but also move entire branches of the tree to different levels. Working with the drag and drop tree control is a little tricky, but you should get the hang of it after a few tries.
If the Reorder link does not appear, it means that this collection is being sorted according to a sort field.
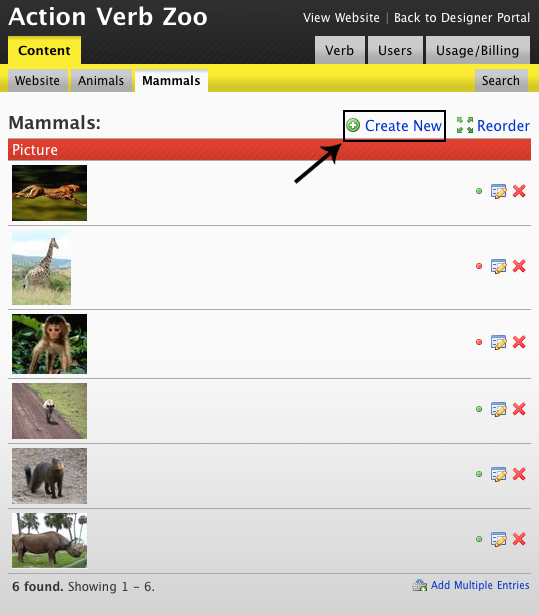
Adding Content
To add a new entry to the current collection, click the Create New link at the top right corner of the List View:
A Create New form will be displayed with an edit field for each structure in the collection:
Click the Add button to complete the process of adding the entry. All validations on the collection will be run and if there are no errors, the entry will be added. If there are validation errors, you will be prompted to correct the errors.
Adding new content under an existing entry in a Nested Collection
Nested Collections support adding entries as a child of another entry in the same collection. To add an entry as a child, click the Add (+) icon to the right of that entry on the List View. This will bring up the Create New form with a header that says that you are adding a new entry as a child entry.
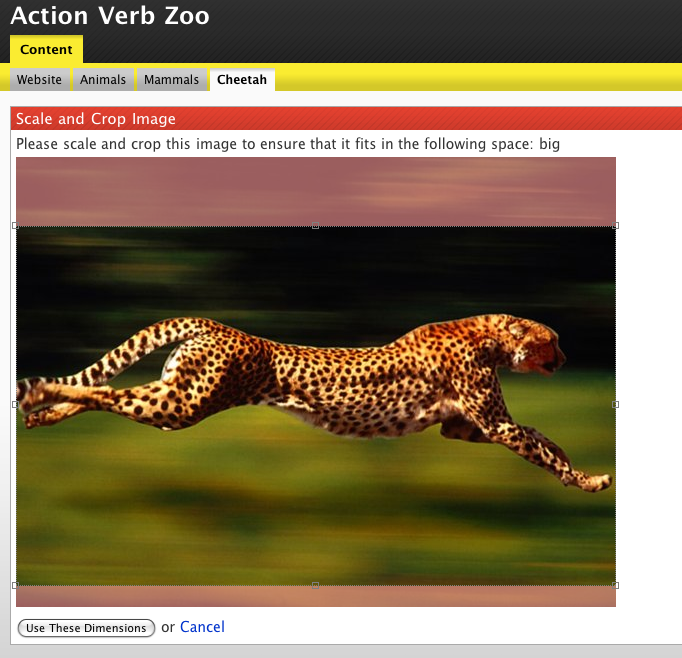
Cropping Images
If your structure contains Image structures that have cropping requirements defined, you will be prompted to crop the images you uploaded. For each image you uploaded, you will see a box labelled Scale and Crop Image. Simply drag and use the resize handles on the crop frame to select the area of your image you would like to highlight. Then click the Use These Dimensions button to save your cropping selection.
Editing and Deleting Content
To edit am entry, simply click the Edit icon at the right of that entry on the List View. This will open an Edit form with an edit field for each structure in the collection. Click the Save button to complete the process of editing the entry.
Adjusting the Quality of Images
If the entry contains JPEG images, you can adjust the compression quality of the image. For most situations, Vae’s default image compression should be a good balance between image quality and image size. However, if you’d like to tweak the compression level, click the Adjust Quality link next to the image:
This will bring you to a box called Adjust Image Compression. Drag and drop the slider at the bottom of the image to select the proper level of quality. Click the Use this compression value button to save your selection and return to the Edit View:
Recropping Images
If the entry contains images that have been cropped, you may also change the cropping from the Edit View. Click the Crop link next to the image and you will be brought to a box labeled Scale and Crop Image:
Drag and use the resize handles on the crop frame to select the area of your image you would like to highlight:
Then click the Use These Dimensions button to save your cropping selection.
Replacing or Deleting Files, Images, and Videos
If the entry contains files, images, or videos, you may replace or delete them. To replace a file, simply click the Replace button next to that file in the Edit View:
To delete a file, simply click the Delete link next to that file in the Edit View:
Deleting Content
To delete an entry, simply click the Delete icon at the right of that entry on the List View:
The content will be deleted instantly.
Searching Content
Vae has a powerful search engine that lets you easily search your content. Access the search engine by hovering over the Search tab at the top-right side of the subnavigation bar. This will pop up a search box containing a text input field a Search All button, and if you are viewing a specific collection, another button to search that collection only.
If you enter a search query and click Search All, Vae will search for that string in all entries of every piece of content on your website. The search results page will display all results and link to the Edit View for each entry:
If you click on the button that is specific to the current collection, the search results page will resemble the List View, providing options to Publish/Unpublish, Edit, and Delete each entry. For this reason, you should use the more specific search option if you can.