Campaigns
The Campaigns tab is the core of the Vae newsletter system. A campaign is one newsletter that is sent out to a list or group of targeted recipients.
The Campaigns tab can be accessed in two forms: as the tab when you first click onto the main tab, or by clicking from the List Dashboard. When accesed as , all campaigns are shown, and the link will ask which list to launch the new campaign on. When accessed from a specific list, only campaigns specific to that list are shown, and the link will assume that the new campaign is on the selected list.
Campaign Lifecycle
Campaigns go through many stages from creation to final delivery. When you first create a campaign, it will have the status Waiting for Confirmation, which means that the campaign is on hold until you approve it. After you view the campaign and confirm it, it will have the status Scheduled, which means that the campaign is ready to be sent and will be sent either as soon as possible (for campaigns without a future send date) or at the date you specified in the campaign. You may still edit the campaign at this point as long as it hasn't begun to send. Editing a campaign automatically returns it to the Waiting for Confirmation status.
Once our system begins to deliver the campaign, the status is changed to Sending. Once this has happened, you may no longer edit or delete the camapgin. Once our system has delivered the entire campaign, the status is changed to Sent. Once the campaign is in this stage, you may view analytics on the campaign. Note that because receiving E-Mail servers can be busy, this does not necessarily mean that all your recipients have received the campaign at that time. It does mean that the messages have all been handed off to our sending mail servers, which will keep trying to send the message for up to 3 days.
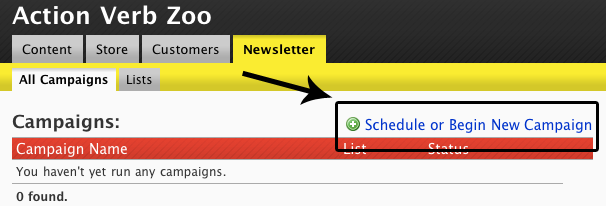
Schedule or Begin New Campaign
To create a new campaign, click the link at the top right corner of the list:
If you were on the All Campaigns tab, a box labelled will be displayed. If you have the Customers tab enabled, it will be divided into 2 sections. These sections are and :
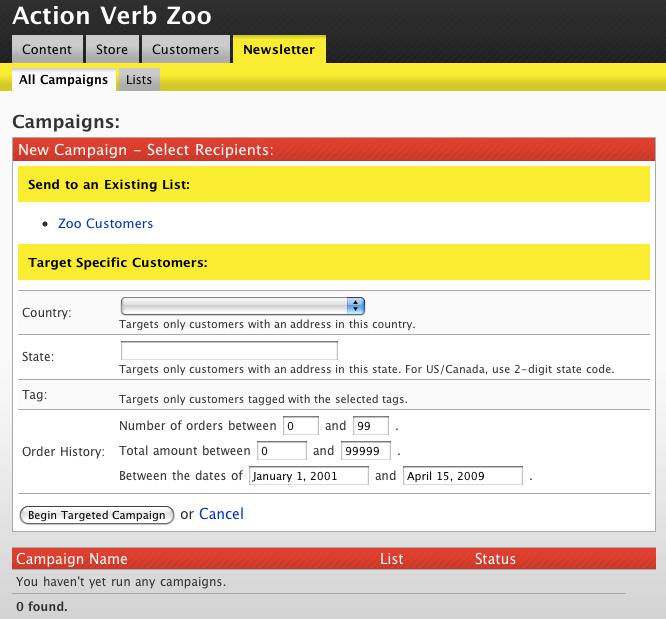
If you do not have the Customers tab enabled, only existing lists will be displayed.
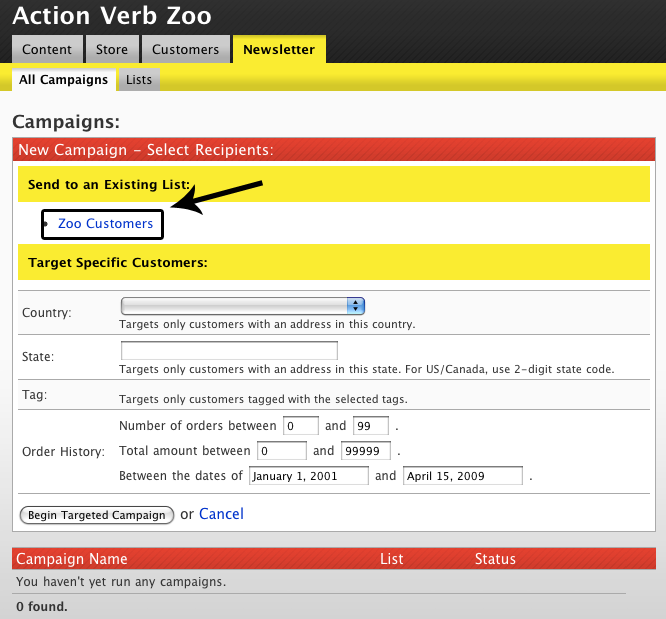
Click on a list name to begin a new campaign on that list:
Or enter targeting criteria into the boxes under to begin a targeted campaign. You may target customers by Country, Stage, Tag, Number of Orders, Total Order Amount, and Order Timeframe. The targeting criteria must all match for a customer to be included in the mailing. The number of customers matching your targeting criteria will be displayed on the following page.
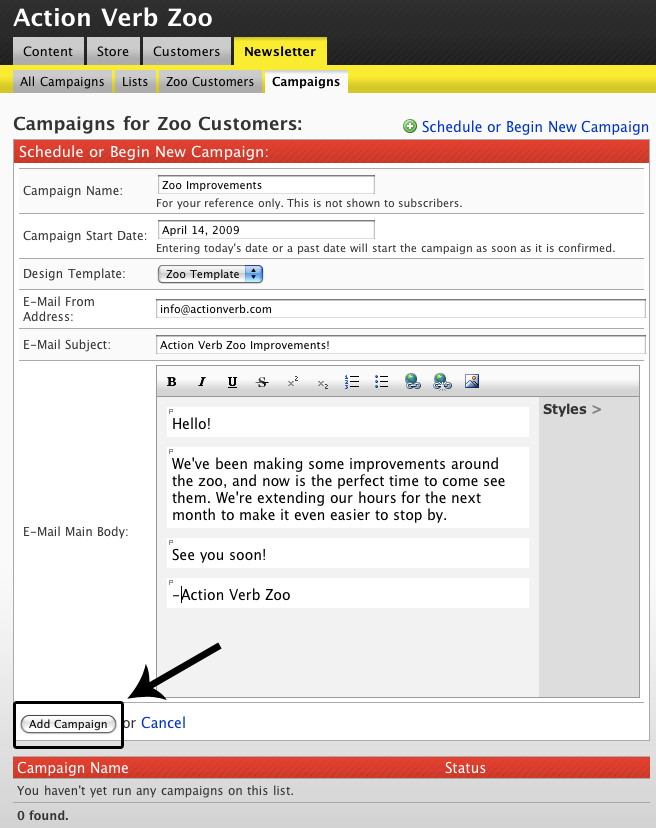
A form will be displayed:
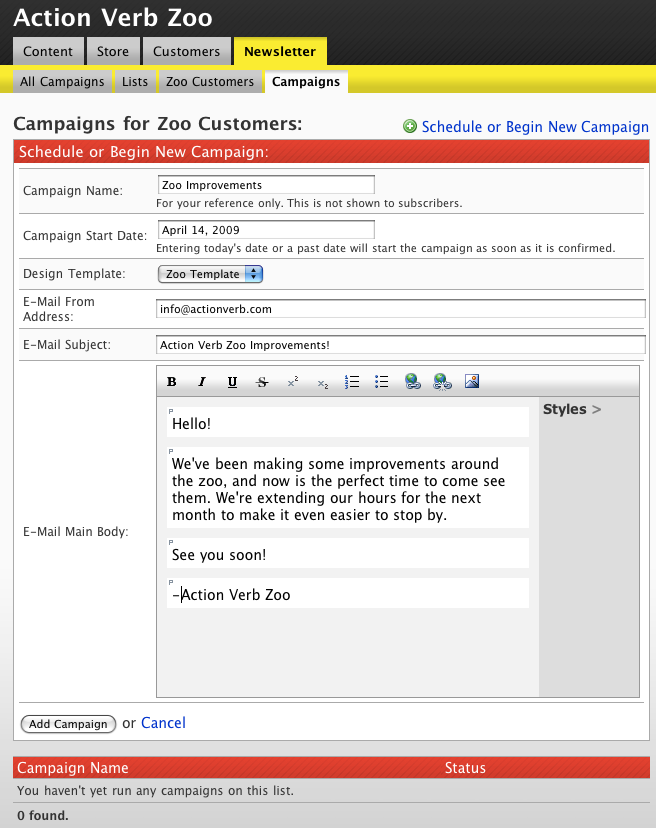
It will have the following fields:
-
- The name of the campaign. This will be displayed internally on the backstage and will not be shown to subscribers in any way.
-
- Date to send the campaign. Entering today's date or a past date will start the campaign as soon as it is confirmed. Entering a future date will start the campaign on midnight of that date.
TipWe plan to offer more fine-grained timing options within the next couple of months.
-
- The template to use for this campaign. To add or manage templates, go to the Templates tab. Changing this value will refresh the page to allow any additional structures for that template to be loaded into the form.
-
- This is the address that E-Mails will appear to be coming from. If you would like to be able to receive replies to your list, provide a real E-Mail address here. You may also provide something like [email protected]. You may also include a name that will be displayed by entering the name and E-Mail address in the format John Doe <[email protected]>
-
- Subject line of the E-Mail that will be sent.
-
- Main Body of the E-Mail that will be sent. This field uses a modified version of the rich text editor that is used on the Content tab for the Rich Text structure. You may style your E-Mail text using Bold, Italic, Underline, Strikethrough, Superscript, and Subscript. You may also add ordered lists, bulleted lists, headers, links, and images. Unlike on the Content tab, images uploaded here will not be resized in any way, so please ensure that the images that you upload are properly sized for your E-Mail.
CautionMany E-Mail clients cannot receive images, or at least do not enable images by default. Vae will automatically send a text version of your E-Mail to accomodate this situation, however, this means that you should avoid putting important content in the images in your E-Mail.
If you selected a template that was built using the VaeML integration method, additional fields may be shown. These fields are specific to your template and will be used to populate the template.
Click the button to complete the process of creating the campaign:
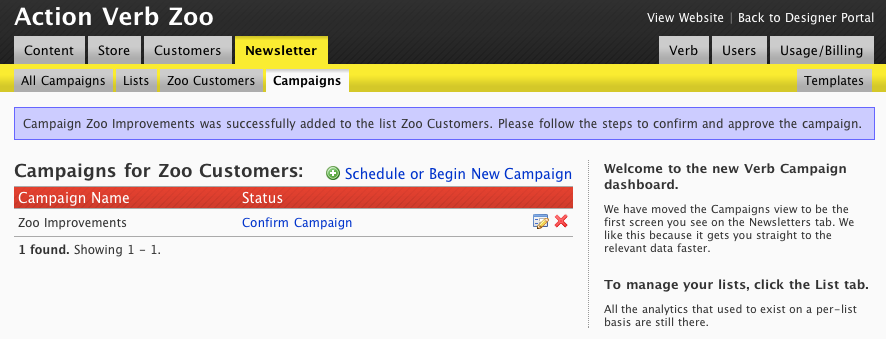
You will be taken back to the list.
Confirming Campaign
Before a campaign will be sent, you must confirm the campaign. In the list, click the link for on the line of the campaign you would like to confirm:
You will be brought to the page:
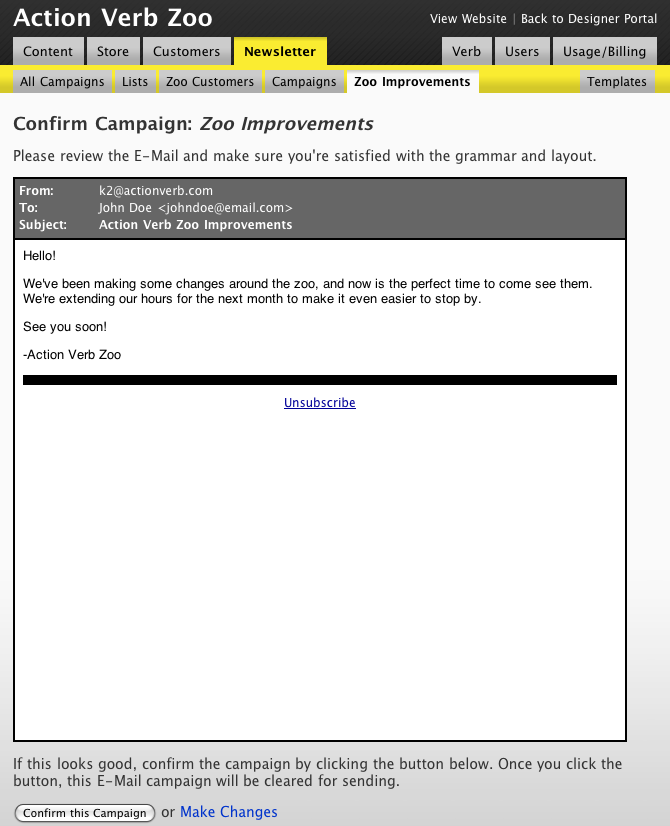
Please review the E-Mail and make sure you're satisfied with the grammar and layout.
If all is well, confirm the campaign by clicking the button at the bottom of the page. Once you click the button, the campaign will be cleared for sending and may send immediately.
If you are not satisfied, you may click the link to edit the campaign. This will take you to the same screen described in the following section.
Editing a Campaign
To edit a campaign that has not yet begun to send, simply click the icon next to that campaign in the list:
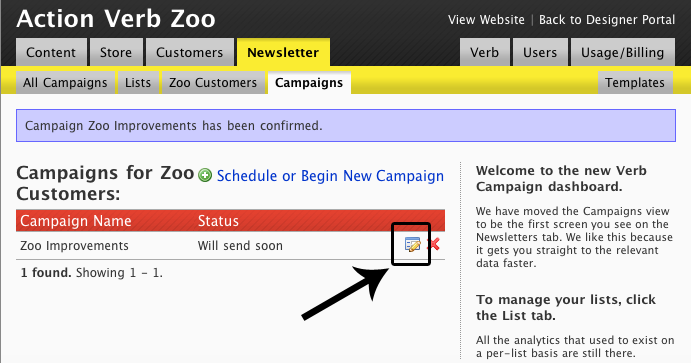
This will open an form with the same fields as the form. Click the button to complete the process of editing the campaign.
Once you save the campaign, it will need to be confirmed before it can be sent. Please refer to the above section on confirming the campaign.
Removing a Campaign
To remove a campaign that has not yet begun to send, simply click the red icon next to that campaign in the list:
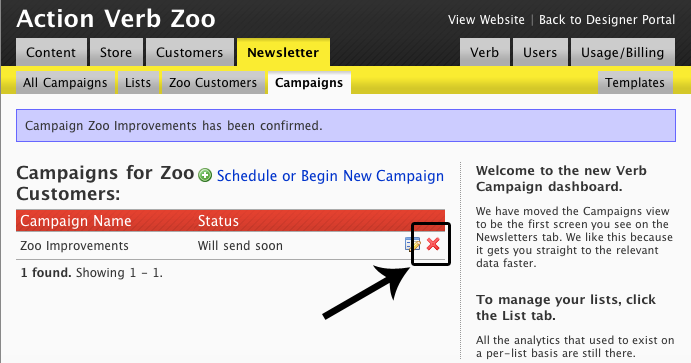
The campaign will be removed immediately and will not be sent.
Viewing a Campaign that is sending or sent
To view a campaign that is sending or has been sent, simply click the icon (looks like a blue page with a green arrow) next to that campaign in the list:
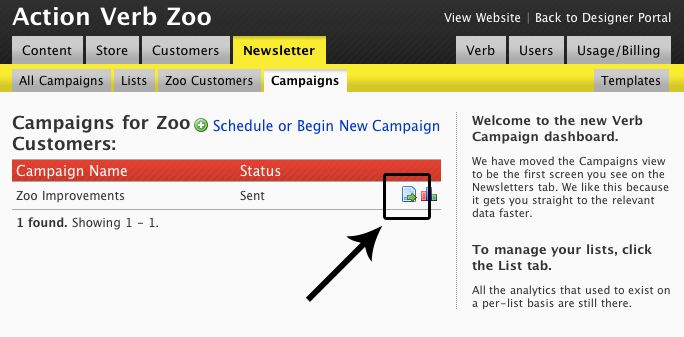
This will allow you to view the campaign as it was sent.
Once viewing a campaign, you may go back to the list by clicking the back button on your browser or by clicking the tab in the tab navigation bar.
Viewing Analytics for a Campaign
To view analytics for campaign that has been sent, simply click the icon (looks like a bar graph) next to that campaign in the list:
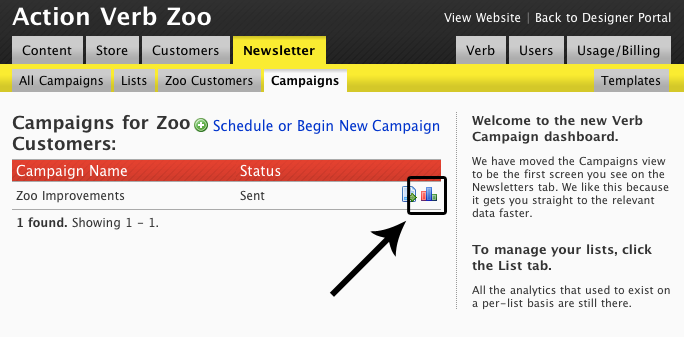
This will take you to the page for that campaign. This page includes information about the number of views and clicks by day, as well as a list of the total number of links that were clicked.
From the page, you may go back to the list by clicking the back button on your browser or by clicking the tab in the tab navigation bar.